Piwigo Photo Gallery

LinuxPHPApacheMySQL

Please feel free to contact us

Go
img

About

Piwigo is open-source photo management software. Manage, organize and share your photo easily on the web. Designed for organisations, teams and individuals. It is a web application to manage your collection of photos, and other media. Embedding powerful features, it powers photo galleries all around the world. There is a wide variety of usages among Piwigo users community. From medium sized galleries to huge image banks, Piwigo can make your life easier and save you time and effort.

Key Features

Photo Management

  • Organize: Allows users to organize photos into categories, albums, and sub-albums. Tags and keywords can be added for easier search and filtering.
  • Batch Upload: Supports uploading multiple photos at once, making it easier to manage large collections.
  • Metadata Handling: Automatically reads and displays metadata (EXIF, IPTC) from photos, such as camera model, location, and date.

Customization and Themes

  • Themes: Piwigo offers a range of themes that can be customized to match the look and feel of your website. You can also create or install custom themes to personalize the gallery.
  • Plugins: Extensible with a wide range of plugins to add functionalities such as social media integration, advanced search, and additional display options.

User Management

  • Access Control: Provides tools for managing user permissions and access levels. You can create different user groups with varying levels of access to the galleries.
  • User Accounts: Allows for user registration and login, which can be useful for community photo sharing or for clients in a professional setting.

Responsive Design

  • Mobile-Friendly: Piwigo’s themes are responsive, ensuring that galleries look good and are functional on a variety of devices, including smartphones and tablets.

Search and Navigation

  • Advanced Search: Includes powerful search capabilities that allow users to find photos based on tags, metadata, and other criteria.
  • Filters and Sorting: Users can filter and sort photos by various attributes such as date, popularity, or file size.

Integration

  • External Services: Integrates with external services for additional functionality, such as Google Maps for geotagging, and social media platforms for sharing photos.
  • APIs: Offers APIs for developers to integrate Piwigo with other applications or to build custom solutions.

You can subscribe to Piwigo, an AWS Marketplace product and launch an instance from the Piwigo product’s AMI using the Amazon EC2 launch wizard.

To launch an instance from the AWS Marketplace using the launch wizard

  • Open the Amazon EC2 console at https://console.aws.amazon.com/ec2/
  • From the Amazon EC2 dashboard, choose Launch Instance.
    On the Choose an Amazon Machine Image (AMI) page, choose the AWS Marketplace category on the left. Find a suitable AMI by browsing the categories, or using the search functionality. Choose Select to choose your product.
  • A dialog displays an overview of the product you’ve selected. You can view the pricing information, as well as any other information that the vendor has provided. When you’re ready, choose Continue.
  • On the Choose an Instance Type page, select the hardware configuration and size of the instance to launch. When you’re done, choose Next: Configure Instance Details.
  • On the next pages of the wizard, you can configure your instance, add storage, and add tags. For more information about the different options you can configure, see Launching an Instance. Choose Next until you reach the Configure Security Group page.
  • The wizard creates a new security group according to the vendor’s specifications for the product. The security group may include rules that allow all IP addresses (0.0.0.0/0) access on SSH (port 22) on Linux or RDP (port 3389) on Windows. We recommend that you adjust these rules to allow only a specific address or range of addresses to access your instance over those ports.
  • When you are ready, choose Review and Launch.
  • On the Review Instance Launch page, check the details of the AMI from which you’re about to launch the instance, as well as the other configuration details you set up in the wizard. When you’re ready, choose Launch to select or create a key pair, and launch your instance.
  • Depending on the product you’ve subscribed to, the instance may take a few minutes or more to launch. You are first subscribed to the product before your instance can launch. If there are any problems with your credit card details, you will be asked to update your account details. When the launch confirmation page displays

Usage/Deployment Instructions

Step 1: SSH into Your Instance: Use the SSH command with the username ubuntu and the appropriate key pair to access your instance.

Username: ubuntu

Password: .pem file

ssh -i path/to/ssh_key.pem ubuntu@instance-IP

Replace path/to/ssh_key.pem with the path to your SSH key file and instance-IP with the public IP address of your instance.


Step 2: Navigate to the URL:  http://IP/ install.php

Please fill out all the details required and click in the START INSTALLATION button.


Step 3: Welcome to the Piwigo  Image Gallery dashboard page. Now, click on the Visit the gallery button.


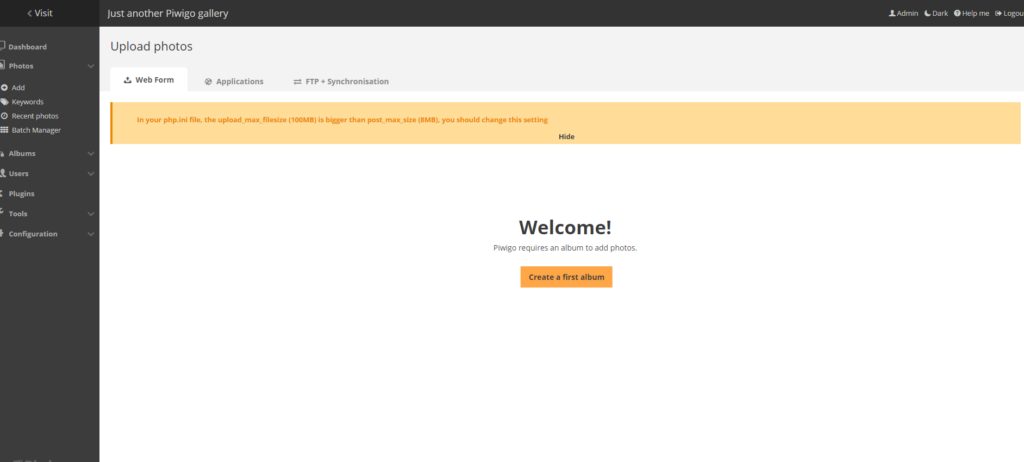
Step 4:  Once you have done the previous step. Click on the I want to add photos.


Step 5: Congratulations, you have completed the installation and configurations. Thank you.

All your queries are important to us. Please feel free to connect.

24X7 support provided for all the customers.

We are happy to help you.

Submit your Queryhttps://miritech.com/contact-us/

Contact Numbers:

Contact E-mail:

Submit Your Request


    Input this code: captcha

    Taking control of your site with a content management system also has great advantages as far as your search engine rankings are concerned. All search engines like to see that websites are updated regularly and favor sites that alter their content on a regular basis. Our CMS platform provides search engine friendly web pages and also allows you to create your own page titles and meta tags used by the Search Engines for page rankings.

    Requirements gathering is crucial, to make sure you buy on what you need, not on the shiny features that look good in the demonstration.

    The Web CMS does not require any special software or any technical knowledge to use. It is a web-based platform and can be accessed wherever you have an Internet connection and a web browser. The interface is very similar to Microsoft Word and does all of the HTML coding for you. You can concentrate on the content and not worry about how it will affect the page layout. It also automatically optimizes your site’s content for search, so that when someone searches for information on your site it is more likely to be found.

    Highlights

    • icon

      Batch manager

    • icon

      Upload your Photos

    • icon

      Organise with album

    • icon

      Browse by dates

    • icon

      Mobile-Friendly

    • icon

      Customization and Themes

    Application Installed

    • icon Piwigo Photo Gallery
    • icon php
    • icon apache
    • icon mysql
    • icon linux