E107 CMS

Please feel free to contact us
Go
Please feel free to contact us
Go
The e107 Bootstrap CMS is one of the most powerful content management systems (CMS), which is based on PHP and MySQL. You can use it to build websites without coding knowledge, which is really cool.
The open source CMS has been specifically built for enabling businesses to automate user experiences in all sorts of devices, including PCs, phones, and tablets.
e107 is an open-source Content Management System (CMS) powered by PHP used to create and manage a website’s content with little or no knowledge of coding languages. It’s responsive and user-friendly, hence used on different devices.
You can subscribe e107 an AWS Marketplace product and launch an instance from the product’s AMI using the Amazon EC2 launch wizard.
To launch an instance from the AWS Marketplace using the launch wizard
Step 1: SSH into Your Instance: : Use the SSH command with the username ubuntu and the appropriate key pair to start the application
Username: ubuntu
ssh -i path/to/ssh_key.pem ubuntu@instance-IP
Replace path/to/ssh_key.pem with the path to your SSH key file and instance-IP with the public IP address of your instance.
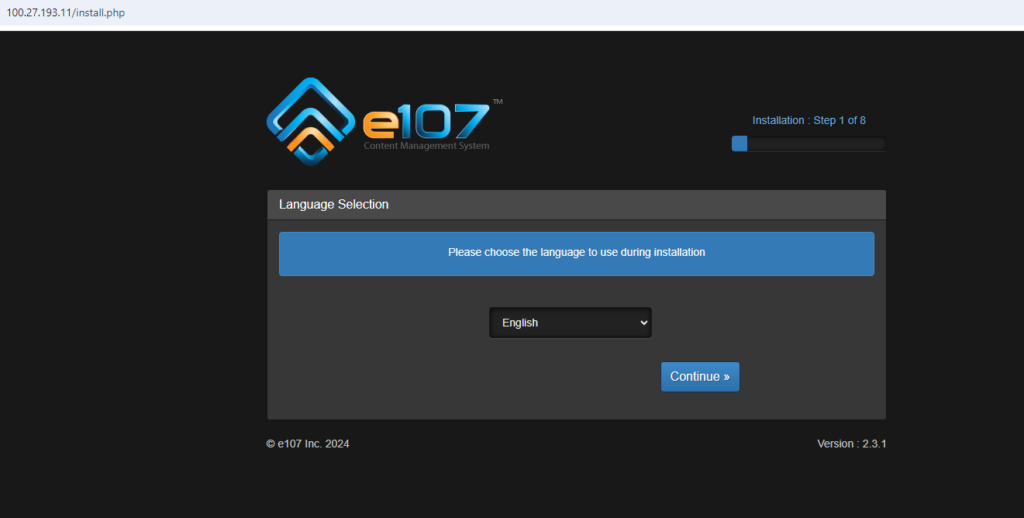
Step 2: Navigate to http://instance-ip. You will be redirected to the dashboard screen.
Select the language and click on the Continue button.
Step 3: Fill out all the details to proceed further.
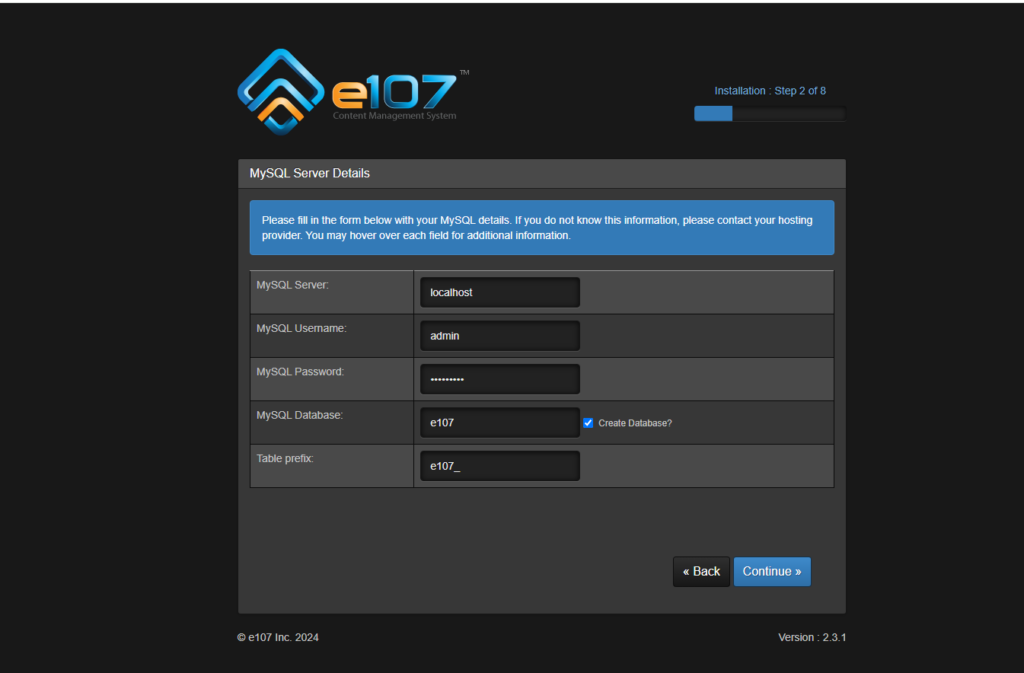
Server name: localhost
Database Username: admin
Database Password: Admin@123
Database Name: e107
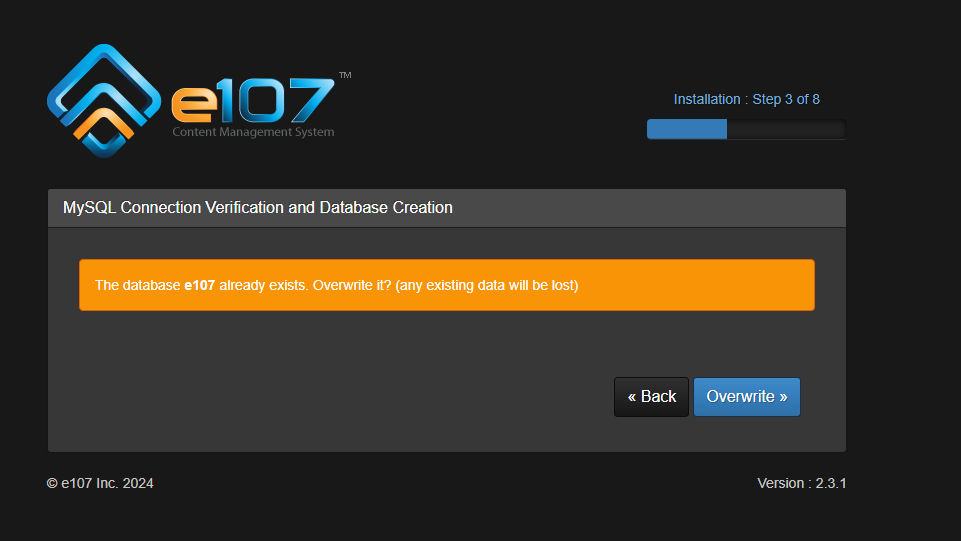
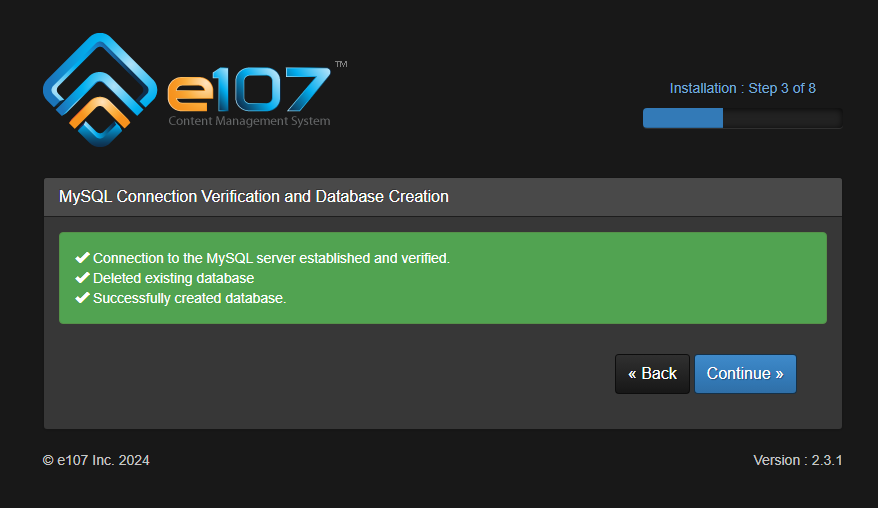
Step 4: Since given database name is already exits, click on the Overwrite button to overwrite the database name.
Step 5: Click on the Continue button.
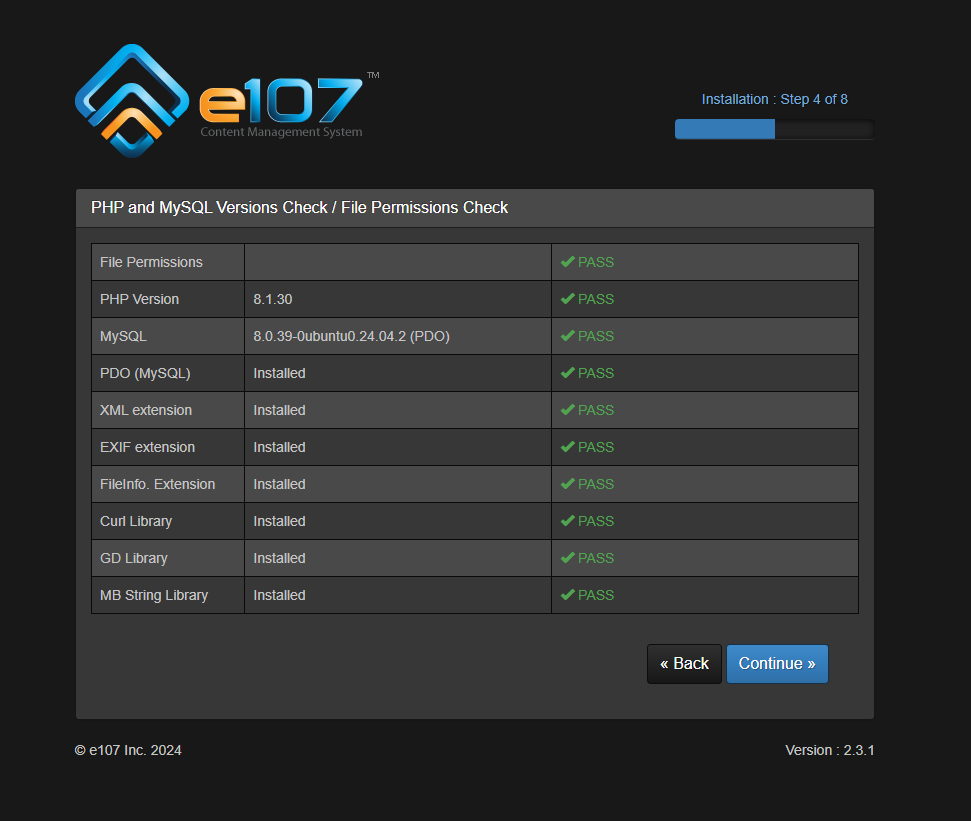
Step 6: Check and verify permissions.
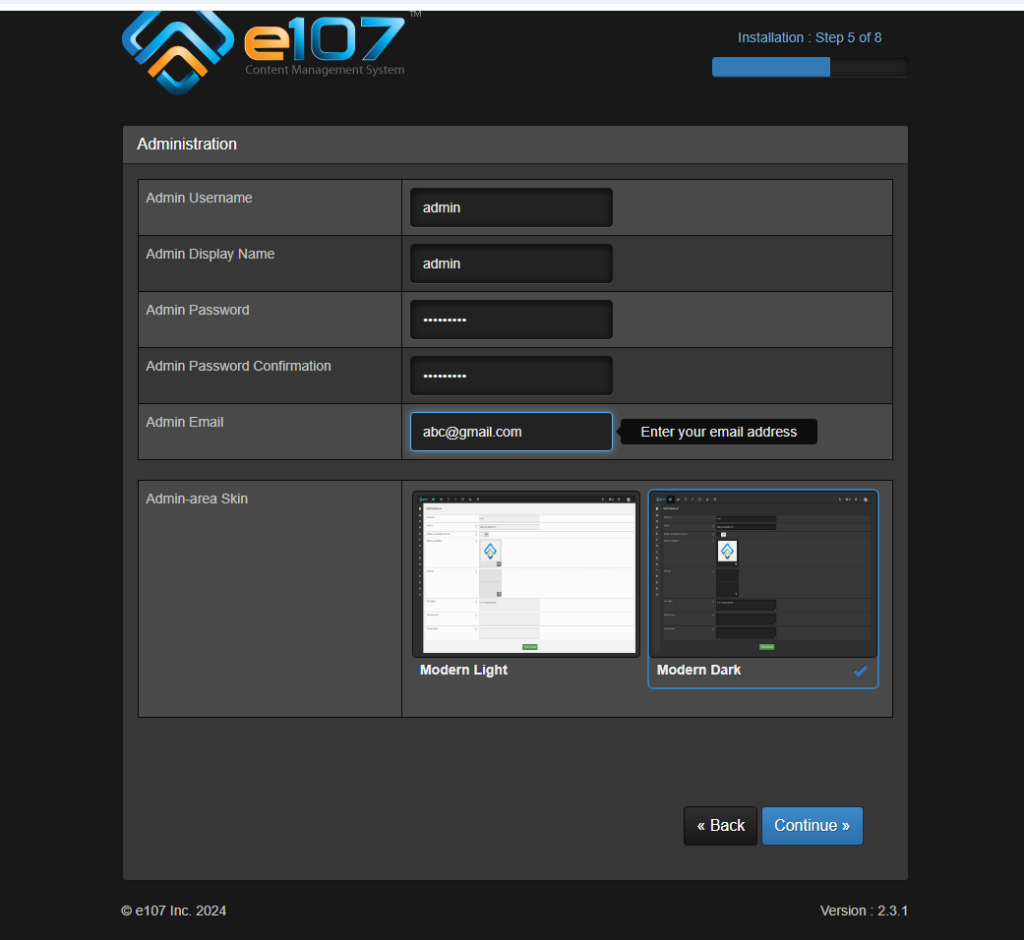
Step 7: Please enter admin details
Username: admin
Password: Admin@123
Step 8: Please enter the website name and select display mode.
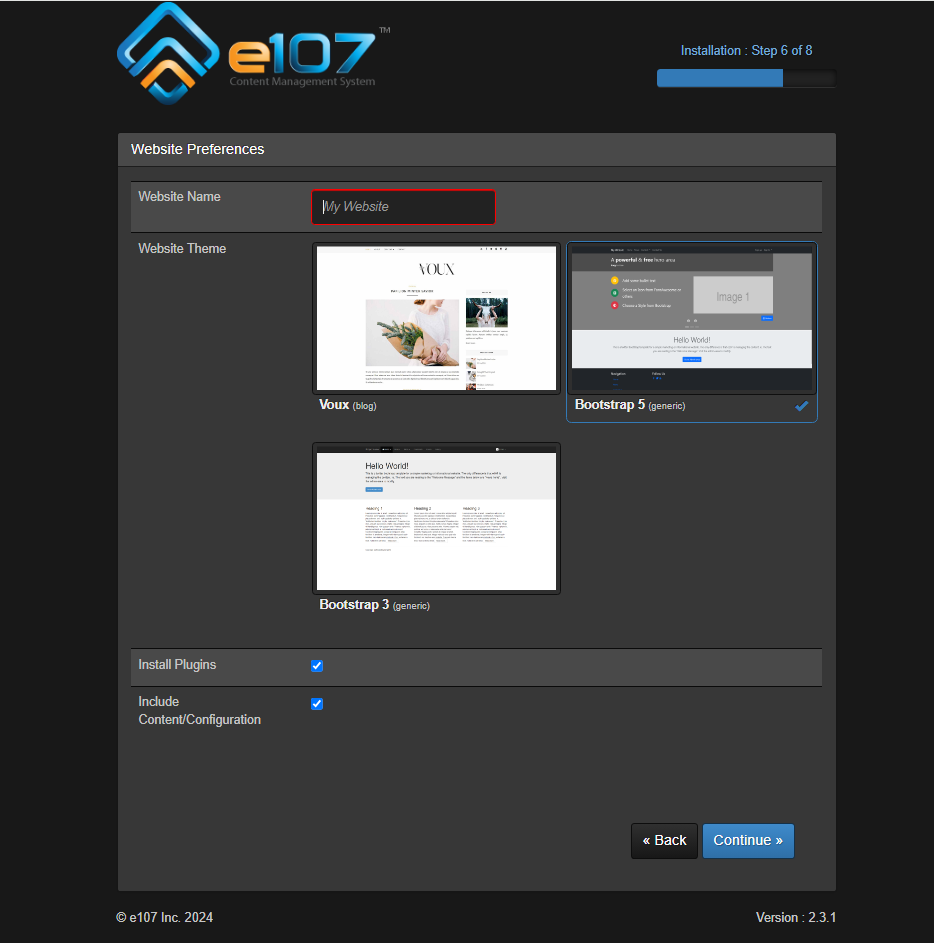
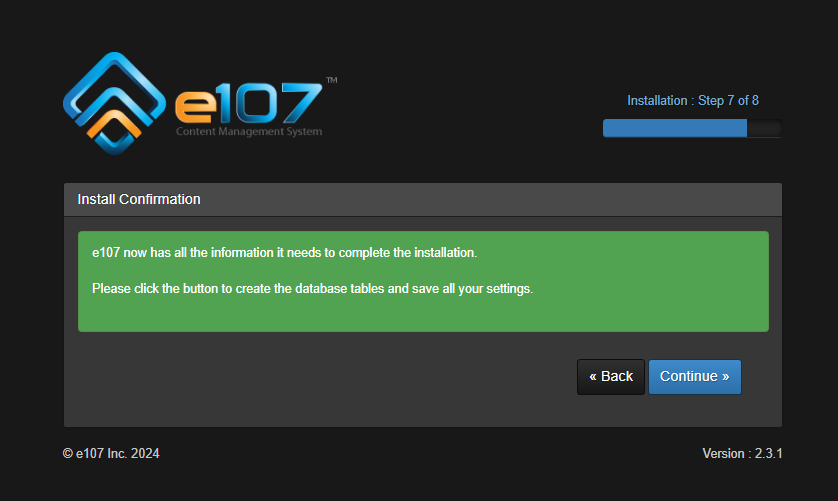
Step 9: Click Continue.
Step 10: Enter the credentials to log in.
All your queries are important to us. Please feel free to connect.
24X7 support provided for all the customers.
We are happy to help you.
Submit your Query: https://miritech.com/contact-us/
Contact Numbers:
Contact E-mail:
Amazon EC2 allows you to set up and configure everything about your instances from your operating system up to your applications. An Amazon Machine Image (AMI) is simply a packaged-up environment that includes all the necessary bits to set up and boot your instance. Your AMIs are your unit of deployment. You might have just one AMI or you might compose your system out of several building block AMIs (e.g., webservers, appservers, and databases). Amazon EC2 provides a number of tools to make creating an AMI easy. Once you create a custom AMI, you will need to bundle it. If you are bundling an image with a root device backed by Amazon EBS, you can simply use the bundle command in the AWS Management Console. If you are bundling an image with a boot partition on the instance store, then you will need to use the AMI Tools to upload it to Amazon S3. Amazon EC2 uses Amazon EBS and Amazon S3 to provide reliable, scalable storage of your AMIs so that we can boot them when you ask us to do so.
Or, if you want, you don’t have to set up your own AMI from scratch. You can choose from a number of globally available AMIs that provide useful instances. For example, if you just want a simple Linux server, you can choose one of the standard Linux distribution AMIs.
Traditional hosting services generally provide a pre-configured resource for a fixed amount of time and at a predetermined cost. Amazon EC2 differs fundamentally in the flexibility, control and significant cost savings it offers developers, allowing them to treat Amazon EC2 as their own personal data center with the benefit of Amazon.com’s robust infrastructure.
When computing requirements unexpectedly change (up or down), Amazon EC2 can instantly respond, meaning that developers have the ability to control how many resources are in use at any given point in time. In contrast, traditional hosting services generally provide a fixed number of resources for a fixed amount of time, meaning that users have a limited ability to easily respond when their usage is rapidly changing, unpredictable, or is known to experience large peaks at various intervals.
Secondly, many hosting services don’t provide full control over the compute resources being provided. Using Amazon EC2, developers can choose not only to initiate or shut down instances at any time, they can completely customize the configuration of their instances to suit their needs – and change it at any time. Most hosting services cater more towards groups of users with similar system requirements, and so offer limited ability to change these.
Finally, with Amazon EC2 developers enjoy the benefit of paying only for their actual resource consumption – and at very low rates. Most hosting services require users to pay a fixed, up-front fee irrespective of their actual computing power used, and so users risk overbuying resources to compensate for the inability to quickly scale up resources within a short time frame.
The CMS is browser-based and will work on both PC and Mac platforms using either Internet Explorer and Firefox. Keyboard shortcuts may vary between the two systems.
Requirements gathering is crucial, to make sure you buy on what you need, not on the shiny features that look good in the demonstration.
Multilingual Support
Plugin Support
Customizable Themes
User- Friendly Interface
Easy Updates
Content Types
E107