Joomla

Please feel free to contact us
Go
Please feel free to contact us
Go
Joomla is a popular open source content management system (CMS) used by millions of people around the world to create website content and online applications.
It’s a free CRM that’s easy to use, making it a great choice if you are new to website development. Joomla! is administered via a web-based interface, and can be installed on any server with PHP and MySQL support.
Joomla is a free and open-source content management system written in PHP. It is used for hosting and managing websites and online applications. Due to its flexibility, extensibility, and ease of use, it has become a popular choice for individuals, businesses, and organizations to build and maintain websites. Joomla provides an intuitive and user-friendly administrative interface that makes it relatively easy for non-technical users to create and manage website content.
You can subscribe to Joomla, an AWS Marketplace product and launch an instance from the product’s AMI using the Amazon EC2 launch wizard.
Step 1: SSH into Your Instance: Use the SSH command with the username ubuntu and the appropriate key pair to start the application.
Username: ubuntu
ssh -i path/to/ssh_key.pem ubuntu@instance-IP
Replace path/to/ssh_key.pem with the path to your SSH key file and instance-IP with the public IP address of your instance.
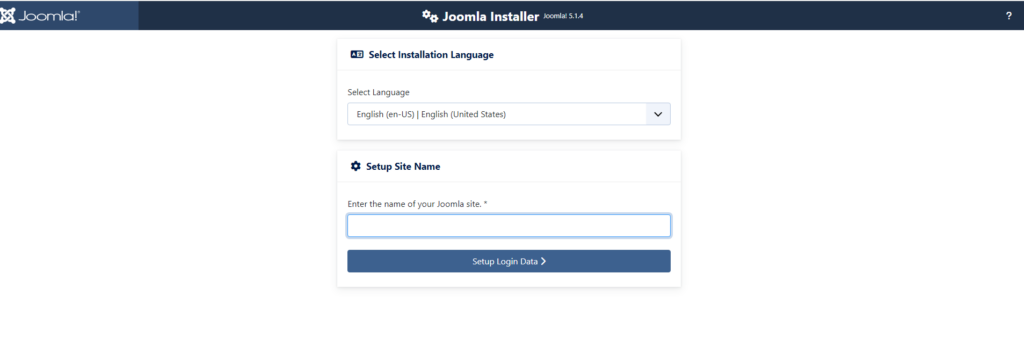
Step 2: Navigate to http://instance-ip. You will be redirected to http://instance-ip/installation/index.php. Select the language and enter the name of the site you’d like to use.
Step 3: Please fill in all the details below real name, username, password and email address.
and click on the Setup Database Connection.
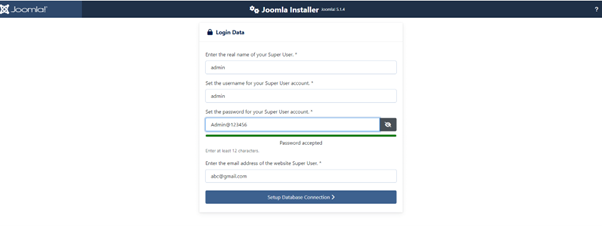
Real Name: admin
Username: admin
Password: Admin@123456
Email: abc@gmail.com
Step 4: Please fill in all the details below host name, database username, database password database name and other details. After completing the form click on the Install Joomla button.
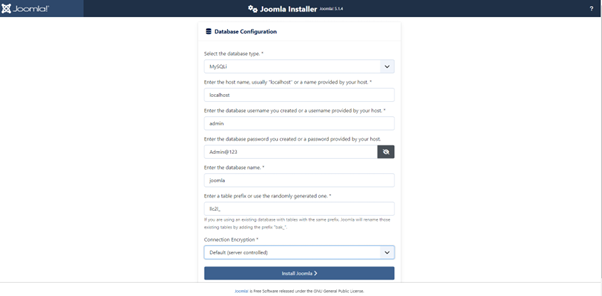
Host Name: localhost
Database Username: admin
Database Password: Admin@123
Database Name: joomla
You have successfully installed the Joomla application in you system. Thank you and enjoy!!
All your queries are important to us. Please feel free to connect.
24X7 support provided for all the customers.
We are happy to help you.
Submit your Query: https://miritech.com/contact-us/
Contact Numbers:
Contact E-mail:
Amazon VPC lets you provision a logically isolated section of the Amazon Web Services (AWS) cloud where you can launch AWS resources in a virtual network that you define. You have complete control over your virtual networking environment, including selection of your own IP address ranges, creation of subnets, and configuration of route tables and network gateways. You can also create a hardware Virtual Private Network (VPN) connection between your corporate datacenter and your VPC and leverage the AWS cloud as an extension of your corporate datacenter.
You can easily customize the network configuration for your Amazon VPC. For example, you can create a public-facing subnet for your web servers that have access to the Internet, and place your backend systems such as databases or application servers in a private-facing subnet with no Internet access. You can leverage multiple layers of security, including security groups and network access control lists, to help control access to Amazon EC2 instances in each subnet.
You may connect your VPC to:
There are two types of VPN connections that you can create: statically-routed VPN connections and dynamically-routed VPN connections. Customer gateway devices supporting statically-routed VPN connections must be able to:
In addition to the above capabilities, devices supporting dynamically-routed VPN connections must be able to:
Amazon S3 is a simple key-based object store. When you store data, you assign a unique object key that can later be used to retrieve the data. Keys can be any string, and they can be constructed to mimic hierarchical attributes. Alternatively, you can use S3 Object Tagging to organize your data across all of your S3 buckets and/or prefixes.
Versioning allows you to preserve, retrieve, and restore every version of every object stored in an Amazon S3 bucket. Once you enable Versioning for a bucket, Amazon S3 preserves existing objects anytime you perform a PUT, POST, COPY, or DELETE operation on them. By default, GET requests will retrieve the most recently written version. Older versions of an overwritten or deleted object can be retrieved by specifying a version in the request.
Taking control of your site with a content management system also has great advantages as far as your search engine rankings are concerned. All search engines like to see that websites are updated regularly and favor sites that alter their content on a regular basis. Our CMS platform provides search engine friendly web pages and also allows you to create your own page titles and meta tags used by the Search Engines for page rankings.
The CMS is browser-based and will work on both PC and Mac platforms using either Internet Explorer and Firefox. Keyboard shortcuts may vary between the two systems.
When in doubt, avoid using non-numerical or -alphabetical characters.
Requirements gathering is crucial, to make sure you buy on what you need, not on the shiny features that look good in the demonstration.
Another important factor is how easy the system is to use – most likely, the people you’d like to update the site won’t be that technically comfortable, so the best solution is one that has solid usability.
no. That is the biggest myth of CMSs. Most of the time, the real issues in content creation are around people and processes, not the technology. You need to manage your content creation like any other project – with a clear workflow and timetable, and enough people—with the right skills—to handle what you need to create. The CMS will help you get the content on to the site, but the much more difficult challenge is creating it. And computers don’t write very well.
The Web CMS does not require any special software or any technical knowledge to use. It is a web-based platform and can be accessed wherever you have an Internet connection and a web browser. The interface is very similar to Microsoft Word and does all of the HTML coding for you. You can concentrate on the content and not worry about how it will affect the page layout. It also automatically optimizes your site’s content for search, so that when someone searches for information on your site it is more likely to be found.
Open Source CMS
Create Website Content and Online applications
Free and Easy to use
Flexibility and extensibility
User-friendly administrative interface
Joomla